Part 2: Styling using CSS and Bootstrap
-
Include the Bootstrap CSS styles in the HTML head. Instructions can be found here
- We don't necessarily need to include the JS Scripts for this assignment - Only include the Bootstrap CSS styles.
- You will notice the fonts, and some layout aspects of the pages changed a bit. It now look something like this.

a little better, already
-
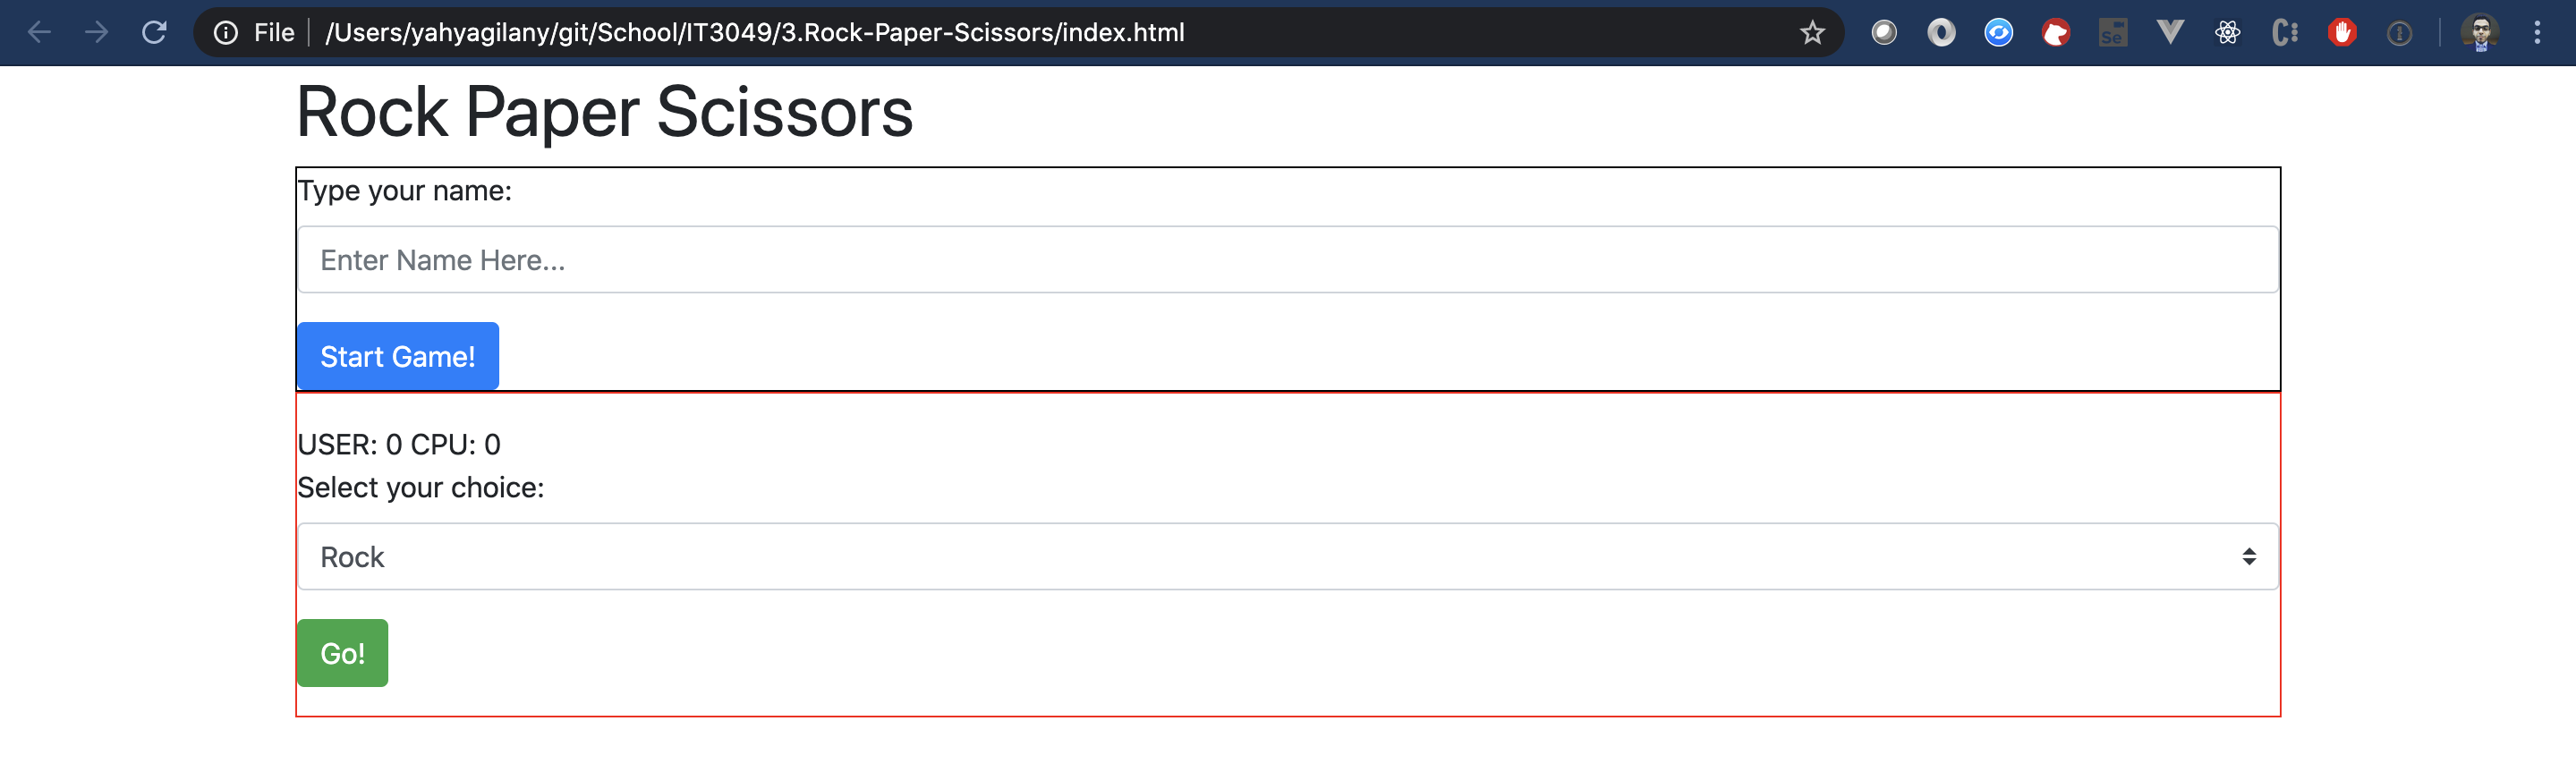
Put a border around the 2 divs;
- Make sure to include the stylesheet file below the bootstrap stylesheet.
- Tip: try typing the Emmet abbreviation:
link:cssthen hit enter. VSCode should make the element and you'll only need to change the path.
-
In the styles.css file:
- set a
1px solid black;border for#welcome-screen - set a
1px solid red;border for#game-screen
- set a
-
Apply Bootstrap classes to the buttons. Examples on Button Classes can be found here
- Set the class attribute of the
Start Game!button to use the bluebtn btn-primarystyle. - Set the class attribute of the
Go!button to use the greenbtn btn-successstyle.
- Set the class attribute of the
-
Apply Bootstrap class
custom-selectto select dropdown. More Info about Bootstrap Select/Dropdown here -
for the
divimmediately below the 2form, give it a class name ofform-group -
for the
<input id="username" ...>, add a class ofform-control
It should now look like this.
Not the best look, but it'll do for now Let's start building the game logic
Testing
- to test that satisfied the styling requirements, run the tests with
npm run test:styling. This will run the E2E tests for the styling component only of this assignment. - You can also run the entire suite of E2E tests using
npm run test:e2e.